Today I will teach you all I know about setting up some fun jelly physics.
Hopefully you will learn a fair bit along the way.
For the sake of readability, I've divided this guide into three acts.
Act I - Making Jelly
Act II - Jelly Code
Act III - Procedural Jelly Wobble
Let's dive right in!
Act I: Making Jelly
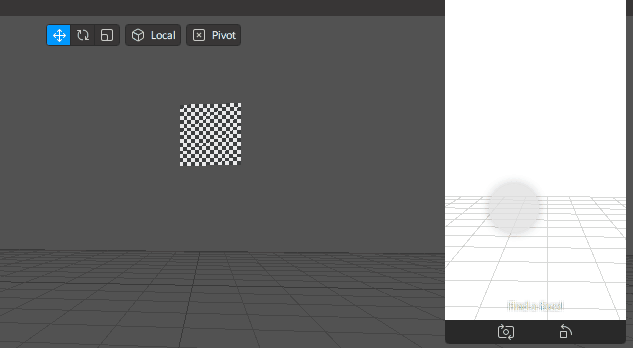
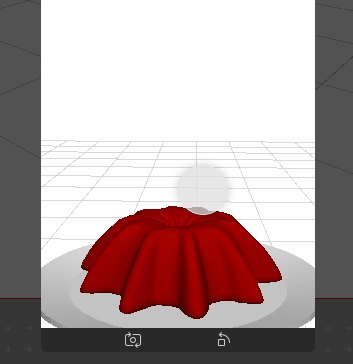
Start off by modelling some simple jelly.
I like to keep a procedural copy of the setup so I can make easy changes later down the track (i.e. changing the number of 'teeth' on the jelly).

Let's rig this flanboy up.
Duplicate the file and make the Jelly and Plate editable.
Get out the Character -> Joint Tool.
Hold Ctrl and Click to create joints. It's easiest to do this in a side view.
Start from the base and work up.
Put down 3 joints.

Move the first joint up to be a child of Jelly and remove the Root null.

Select all joints and the Jelly.
Go Character -> Commands -> Bind (Options).

In the Bind Options, untick Keep Empty and Tick Joints Only.

That will create a Skin and a Weight tag.
Click on the Weight tag and ensure all three joints are included.

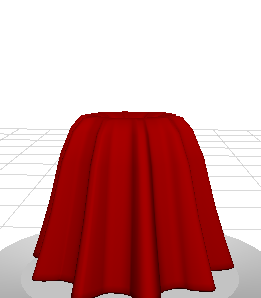
Now the scary bit. Weight painting!
This part is easier to do in the side view. Play around with the Weight Tool to get the perfect Strength, Radius, and Falloff. The goal here is to get something like this:
Joint 1

Joint 2

Joint 3

You can control the smoothness of the jelly by smoother weight painting.
Hit that export button and lets proceed to Spark!

Act II: Jelly Code
(Don't Panic, there's not much code)
Before we get to playing with the jelly, let's get our hands dirty by looking at some quick code I've previously written up. Take some time to soak this Processing script in. To preface, void draw is a function that is being run continuously.
I've taken the liberty of highlighting the important bits.

And here's what it does:

It's currently working only on the X position, but it can just as easily be done on the Y for full 2D jelly physics.
Let's examine this code a bit closer.
To bridge our knowledge gap, I'll translate the important bit into patch language.
1.  mouse -> Target;  // set target
2.  Target subtract Position -> multiply 0.1 -> add Velocity -> multiply 0.8 -> Velocity  // chase and slowdown
3.  Position add Velocity -> Position // physics
In this case, there are three variables we will work with.
Position: Where our jelly is.
Velocity: How fast our jelly is moving
Target: Where the jelly intends to move towards
Unfortunately for us, there isn't a way to read/write from variables without getting our hands messy with code... or is there?
Here's a little method I found that works quite nicely.
We can store and read data in the transform coordinates of objects.
Start off by creating a null object at the root of the heirachy.
Create three nulls, respectively named Position, Velocity, and Target.

We can visualise the position of our Target by placing a plane inside it. Let's call this plane DebugPlane.

In our first line of code,
1. mouse -> Target; // set targetWe are reading data from the mouse and storing it in the Target.
Instead of reading the mouse, we will read the touch position.
We can get obtain this by using the Screen Pan patch's 2D Position output.
This output is the pixel coordinates of the touch (e.g. 215, 750). For simplicity's sake we want to normalise these values. Normalisation is the process of fitting a value into a range between 0 to 1.
We can do this by Dividing the 2D Position by the Device's Screen Size.
This means touching the top left corner will be (0, 0), the bottom right corner will be (1, 1), and the middle will be (0.5, 0.5).
If our finger is not touching the screen, we will recenter our target to 0.5, 0.5.

We then want to store it in the Target 3D Position.
We provide a Vector 2 but it wants a Vector 3. A super quick way to convert Vector 2 to Vector 3 is by using the Swizzle patch and leaving the z as 0 (xy0).

Simulate Touch and drag around the screen.
Don't fret if the Target moves in the wrong direction.
This is because the Screen Pan's 2D Position works differently to 3D World Space.
In 2D, going down increases the Y, while in 3D going down decreases the Y. Keep this in the back of your mind.
In the next line of code,
2. Target subtract Position -> multiply 0.1 -> add Velocity -> multiply 0.8 -> Velocity // chase and slowdownWe first want to read both the Target and the Position data.
We then perform a multiply operation on it to adjust the force at which our jelly wobbles.
We then read from Velocity, add it, and multiply it by 0.8.
The 0.8 value adjusts the velocity multiplier each frame.
A value of 1 will make it bounce on forever.
1.2 will make it go faster to infinity.
0.5 will quickly slowdown the bouncing.
Finally we store it in the Velocity 3D Position.

In the final line of code,
3. Position add Velocity -> Position // physicsWe will set the Position to be the addition of the current Position and the Velocity.

Now visualise the Position by moving the DebugPlane into the Position null.
You should see the plane wobbling as you click and drag around the simulator.
Feel free to experiment with the Multiply values in the Patch Editor to change the strength of the wobble. I've found a slowdown multiplier of 0.87 works quite nicely.

Now that we have our wobble logic complete, let's apply it to the jelly.
Act III: Procedural Jelly Wobble
Start by importing our Jelly into the Focal Distance.
Feel free to scale and move it down so we can see it on the screen.
Give the Jelly and the Plate a simple material to start with.

We can make our jelly wobble by manipulating the position of its bones. We can do this by remapping our wobble effect to fit the position and size limitations of the jelly's bones.
Begin by unpacking the Position of our wobble.

We stored our wobble data in the x and y values.
Let's start with the x.
We will use a To Range patch to fit our x wobble into a range between -0.3 and 0.3.
We will then Pack it into a Vector 3 and store it into our Joint_2's 3D Position.

Now when you drag around horizontally, the jelly should also wobble horizontally.
If it wobbles in the wrong direction, this is likely because of the original rotation of the jelly model's bones (i.e. X Facing / Z Facing). No stress! Just feed the To Range's output into the Pack's Y or Z input.
Now that we've done the x, let's do the y.
We will simply Subtract 1 from the Y and feed that into the Pack's Z input. Like before, if you get the wrong direction, try feeding it into the Pack's X or Y input.
You'll notice it now works on the Y but you can drag the jelly to go below the plate.
Correct me if I'm wrong but I'm not sure jelly is meant to do this:

Easy fix, anything is possible with the power of Clamp. This will ensure the jelly does not go passed a certain limit. We will set the Min to -1 and the Max to 0.1.

Finally, to get more wobble motion, drive the child joint's position (Joint_3) with a delayed version. You can use the Delay patch set to 0.1 for a nice wobbly effect.

So far so great!
Something to note, the more joints you have, the more wobbly the physics.
You can have a child joint set to a 0.1 second delay, a grandchild joint set to a 0.2 second delay, a great-grandchild joint set to a 0.3 second delay and so on.. With this trick, you can create a pretty cool snake-like wobble.
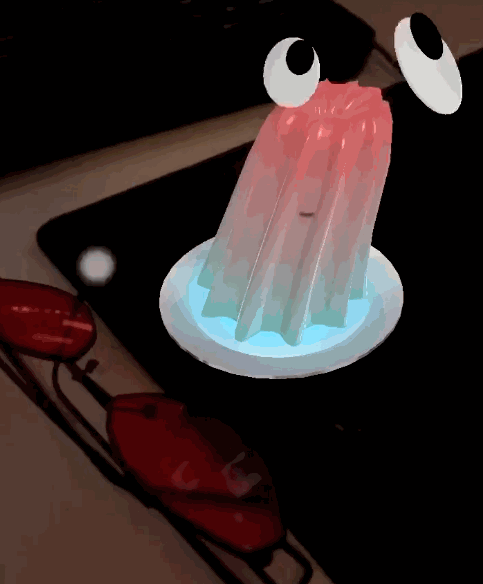
Feel free to dress it up with some materials, google eyes and cosmetics.
Give my effect a try here:
Instagram - https://www.instagram.com/ar/915525465967595/